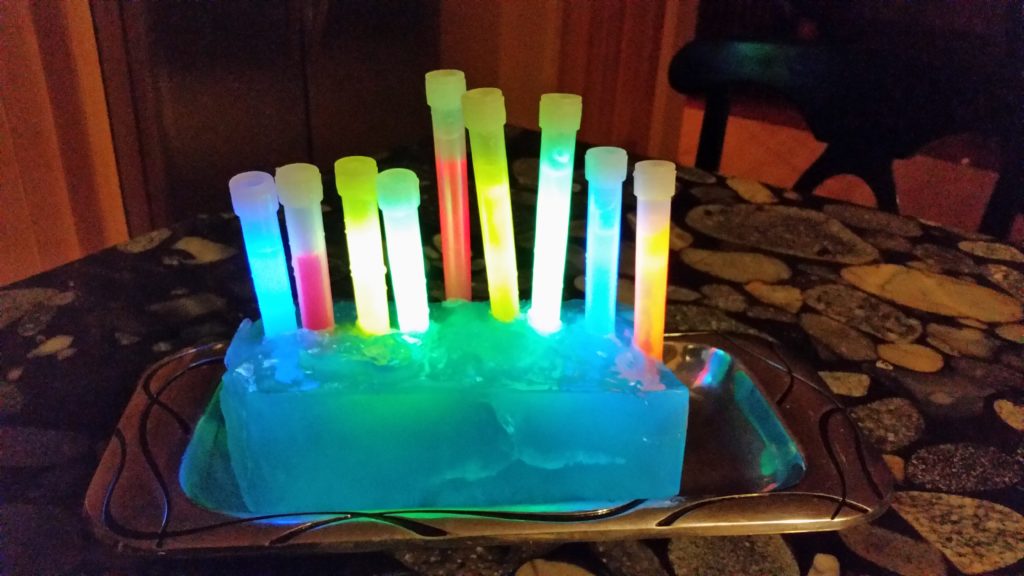
Like most people, my greatest fault is also my greatest asset: unbridled enthusiasm. This year, while scanning a bevy of Hanukkah items for sale, I came across a clear plastic hanukkiah filled with glow sticks. Awesome! After looking at it and silently lusting for one, I decided I did not want to shell out the dough for something plastic and semi-disposable. Then I had a brilliant idea: ice. Could I make a hanukkiah out of ice? What could be a more natural Hanukkah decoration for Minnesota’s frozen chosen than an ice hanukkiah? I decided, with all of my gusto, that I most certainly could make one, and so can you!
Here is what you need and how to begin:
- Empty carton, mold or vessel
- 8 glow sticks
- Food coloring (optional)
- Ruler
- Drill (you can do this without a drill, too. See directions below,
Directions
- Take your empty carton, mold, or vessel. As long as you can fill it with water and place it somewhere to freeze, you are good. I used empty half-gallon milk cartons, although after my test run, my mind was still racing trying to imagine what else I could use.
- First, I washed out my cartons and filled them with water.
- I experimented a bit and added blue food coloring to a couple of the cartons. The effect of the food coloring is really neat; however, and I cannot stress this enough, the food coloring stains your hands. A lot. So add coloring at your own risk or wear gloves when unmolding the ice from the mold.
- The time needed for the water to freeze will vary on the size of your container. For a half-gallon milk carton in cold temperatures, a night outside did the trick.
- Prepare your mold for drilling by measuring and marking on the mold where you want your candles or glow sticks to be placed.
- Then, carefully drill the holes.
- Do not unmold your ice before drilling! I know because I tried it and it was an epic fail. The ice melts. News flash, I know, but I didn’t expect it to get as slick as it did so quickly. I also couldn’t space the holes very well while trying to steady the slippery ice. Take my word for it and leave the ice safely in the mold until after you have drilled the holes. After you drill have drilled the holes, test them to make sure your glow sticks/candles fit; then unmold, and you are done.
If you do not have access to a drill, fret not, for you can still make an ice hanukkiah.
To make an ice hanukkiah without a drill, carefully make holes in a container before filling it with water. You can place your candles or glow sticks in the water BEFORE freezing it. Cut holes, fill the container with water, place candles/glow sticks into the holes, and freeze. You can control how deep your luminaries rest inside the ice block by placing rubber bands or something around the top of each luminary, thus blocking it from sliding inside the container.
When it comes time to unmold, just run the container under a bit of water. The running water will loosen the ice from the container and make it easier to cut off or remove.
The only challenge I had with making an ice hanukkiah without a drill was cracking the glow sticks (to activate them). I recommend having something handy so you can give them a good whack. Keep in mind that the glow sticks will also be frozen and will need a moment before they start to glow.
Once you have your ice hanukkiah lit, it really is fun. You can display your ice hanukkiah either outside or on a tray as an unconventional centerpiece for a Hanukkah party.
For our family, I cannot think of a better way to display our enthusiasm for Hanukkah.


